Somehow this weekend came and went without me being able to even step foot in the shop. It was a long a difficult weekend with a couple of high notes but ultimately I felt bad for not getting anything done on the Prius and now my brakes are so bad I am not going to be able to drive my truck till they are fixed.
Just for the hell of it. I decided to take an early lunch and hit the shop to see what i could accomplish. Coffee in hand I jumped on the golf cart and headed down to the shop. Now the trailer is out of the way it is much nicer to park out front. It’s going to be hot today and it is already 74º inside the shop but I have the fan on and the music is good as usual.
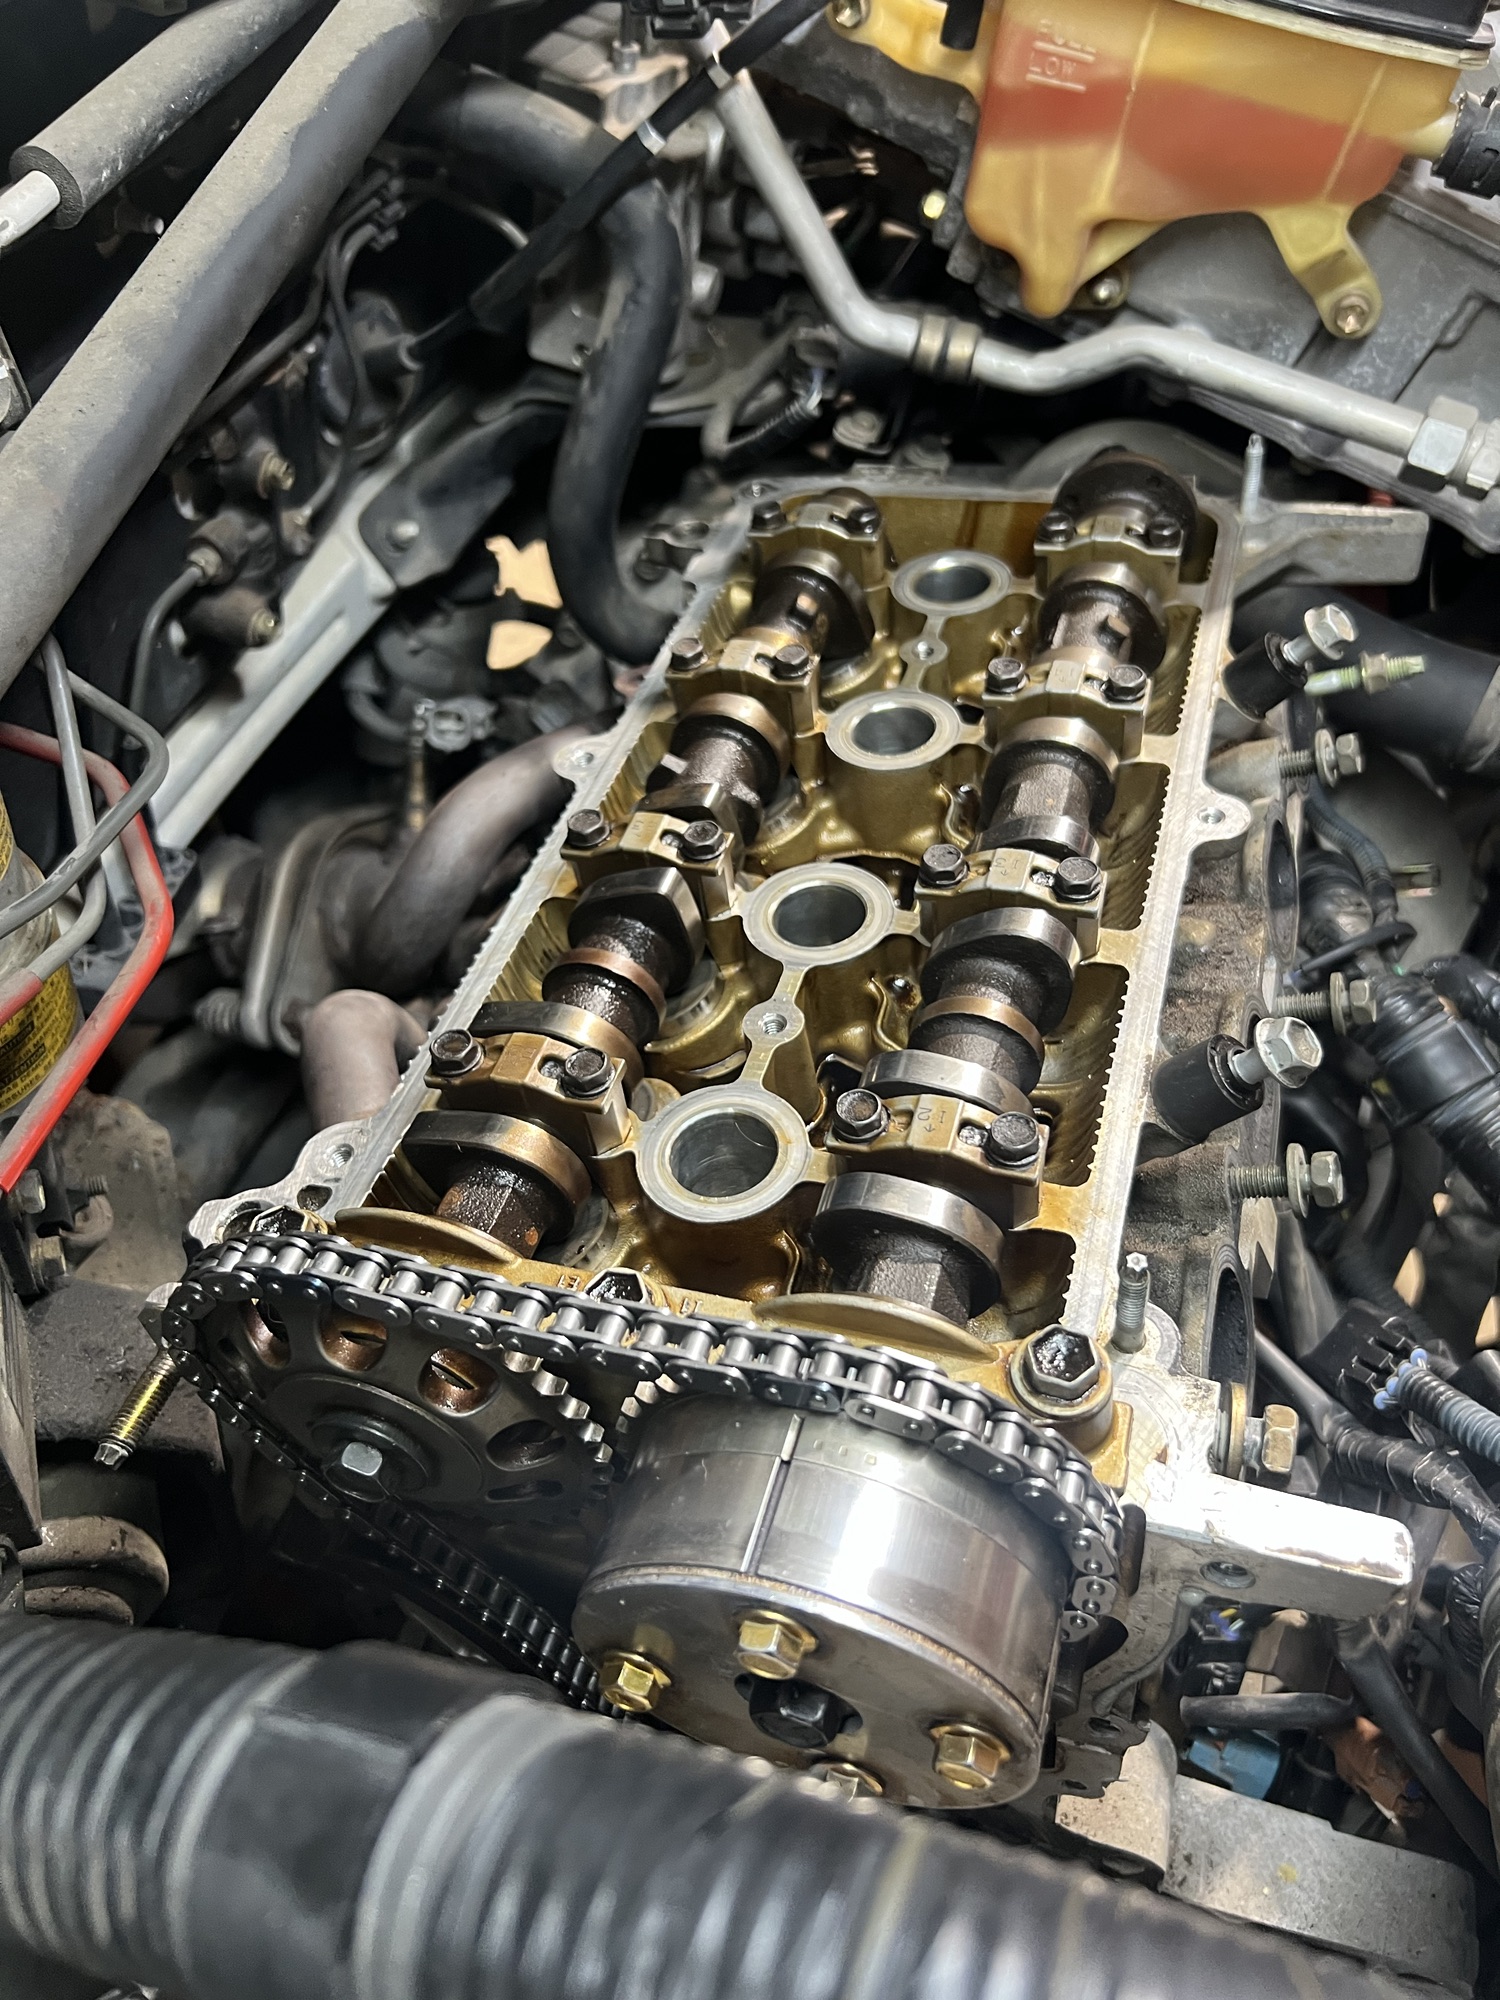
I finally have everything I need to put this timing chain on. I have new replacement bolts for the 5 point 11mm m6 1.0 threaded b4$t4rd children that were holding the front plate on the VVT sprocket. I can’t shake the feeling that I may have put it together wrong when I took it apart, so I do it again. This time I see that there is only one way to put it together due to a pin and hole alignment between the two plates. Now I feel better and the insides got cleaned a little more and I paint yellow on the alignment pin hole by the center bolt. So now its time to put it back in the car. I swear I have installed these cams 4 times already. Well here goes number 5. I grab the exhaust cam with the sprocket on it and line up the timing mark to point straight up and the number 12 spot then I grab the intake cam and do the same. I torque the cam bolts up with my 1/4″ torque wrench it supposed to go the 9 ft.lbs. but this wrench shows in.lbs. so multiplying by 12 I get 108 inch pounds. I make sure to follow the torquing order but get confused about doing a second round of tightening which I see is 17 ft. lbs.

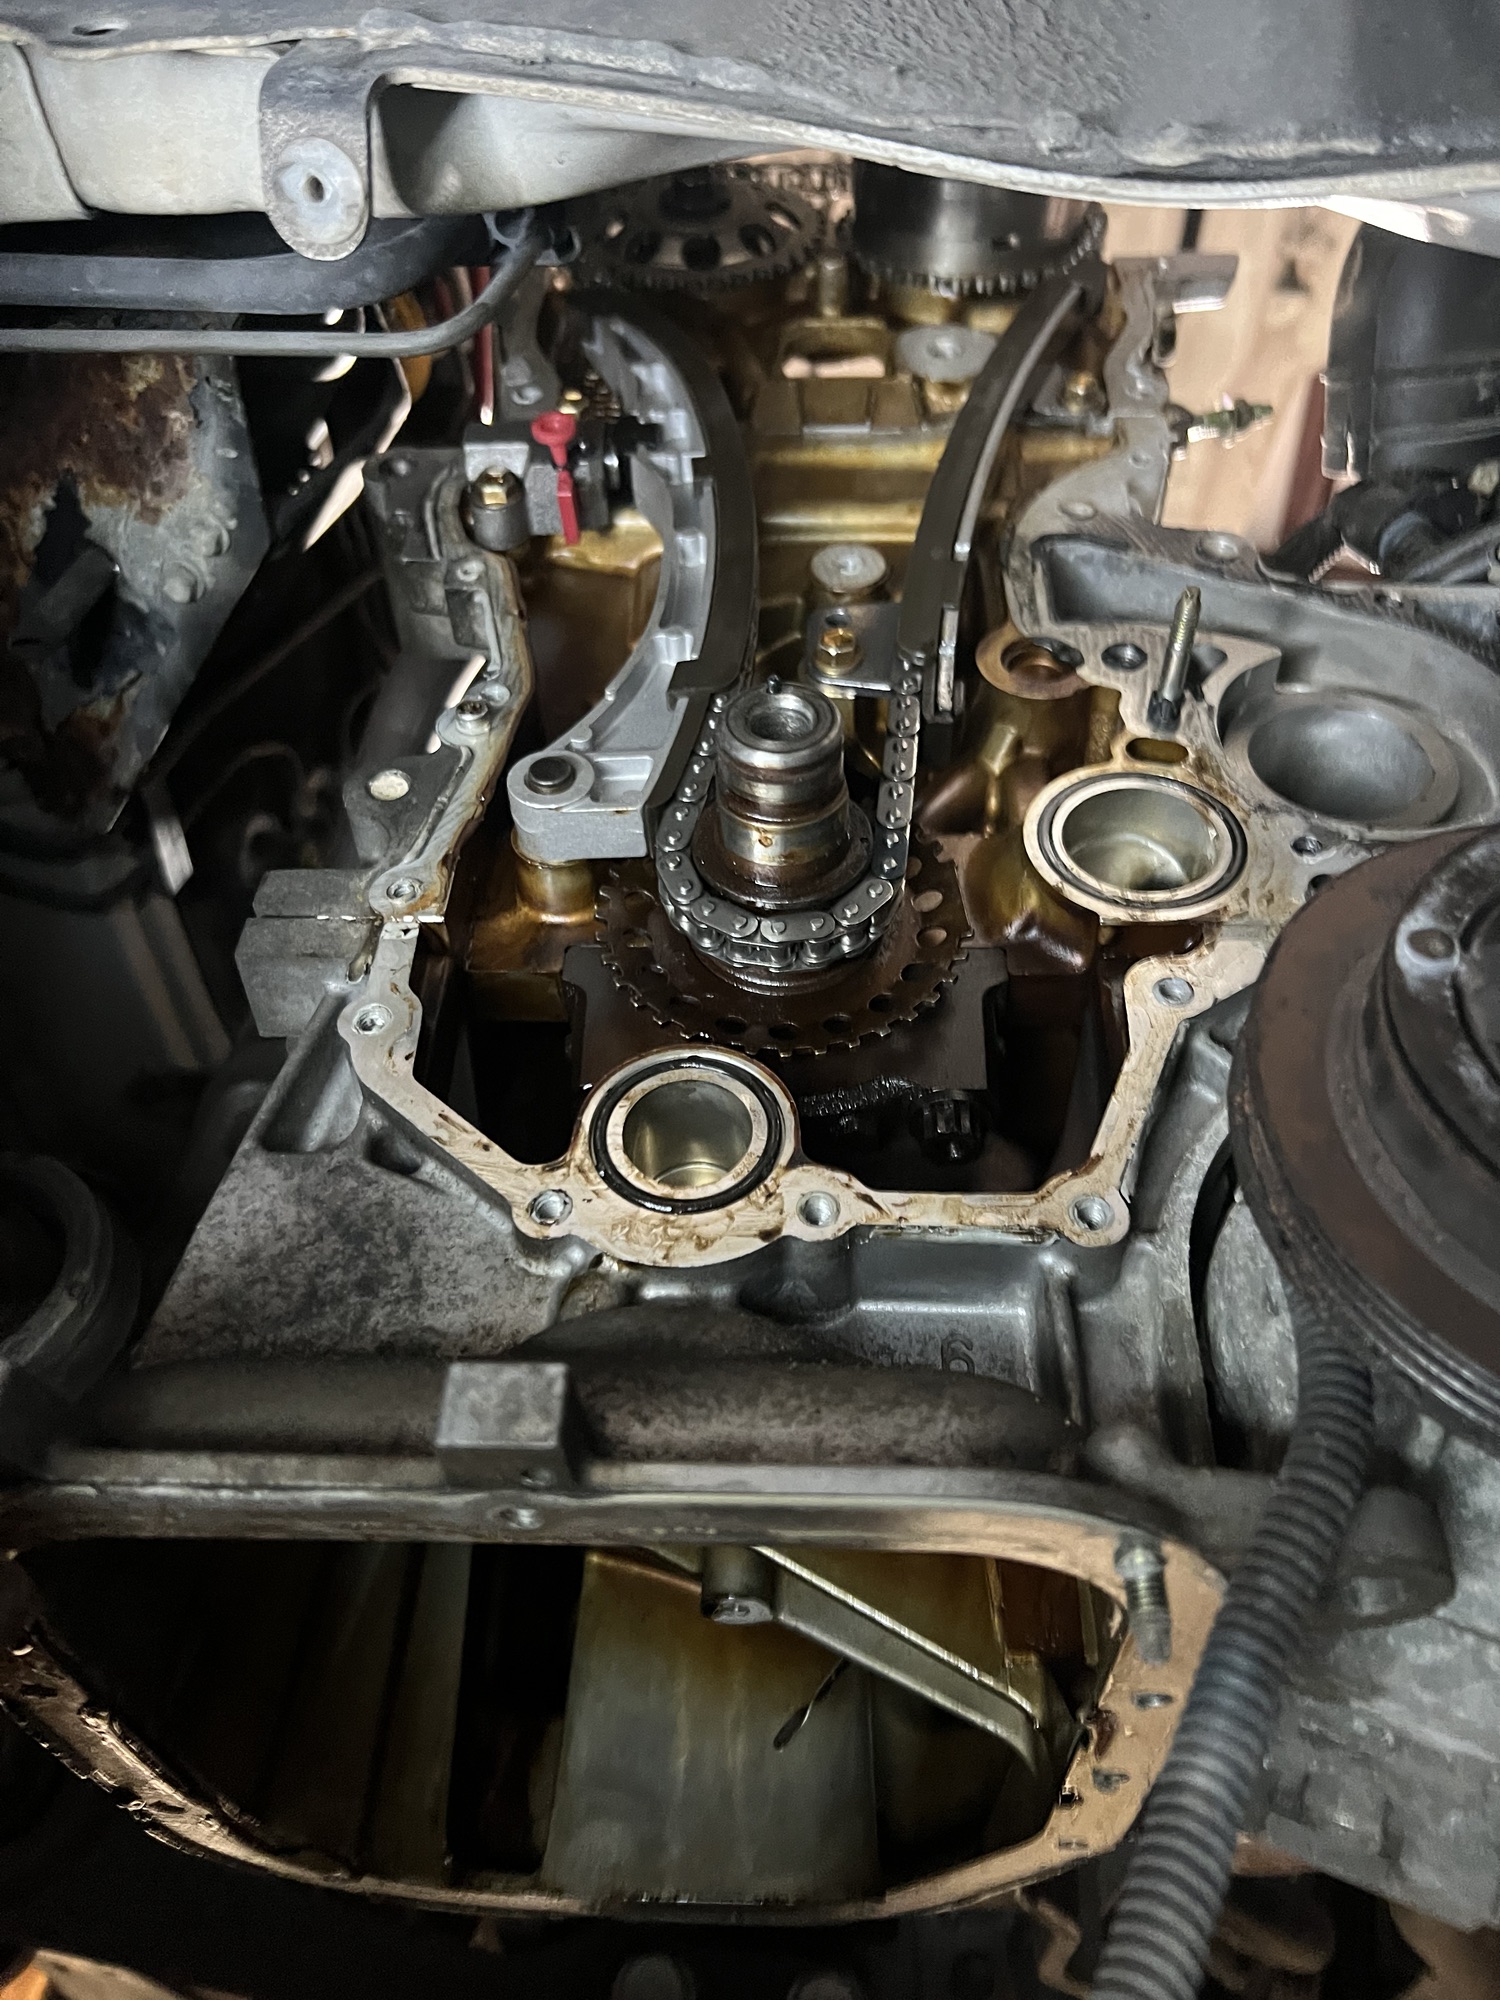
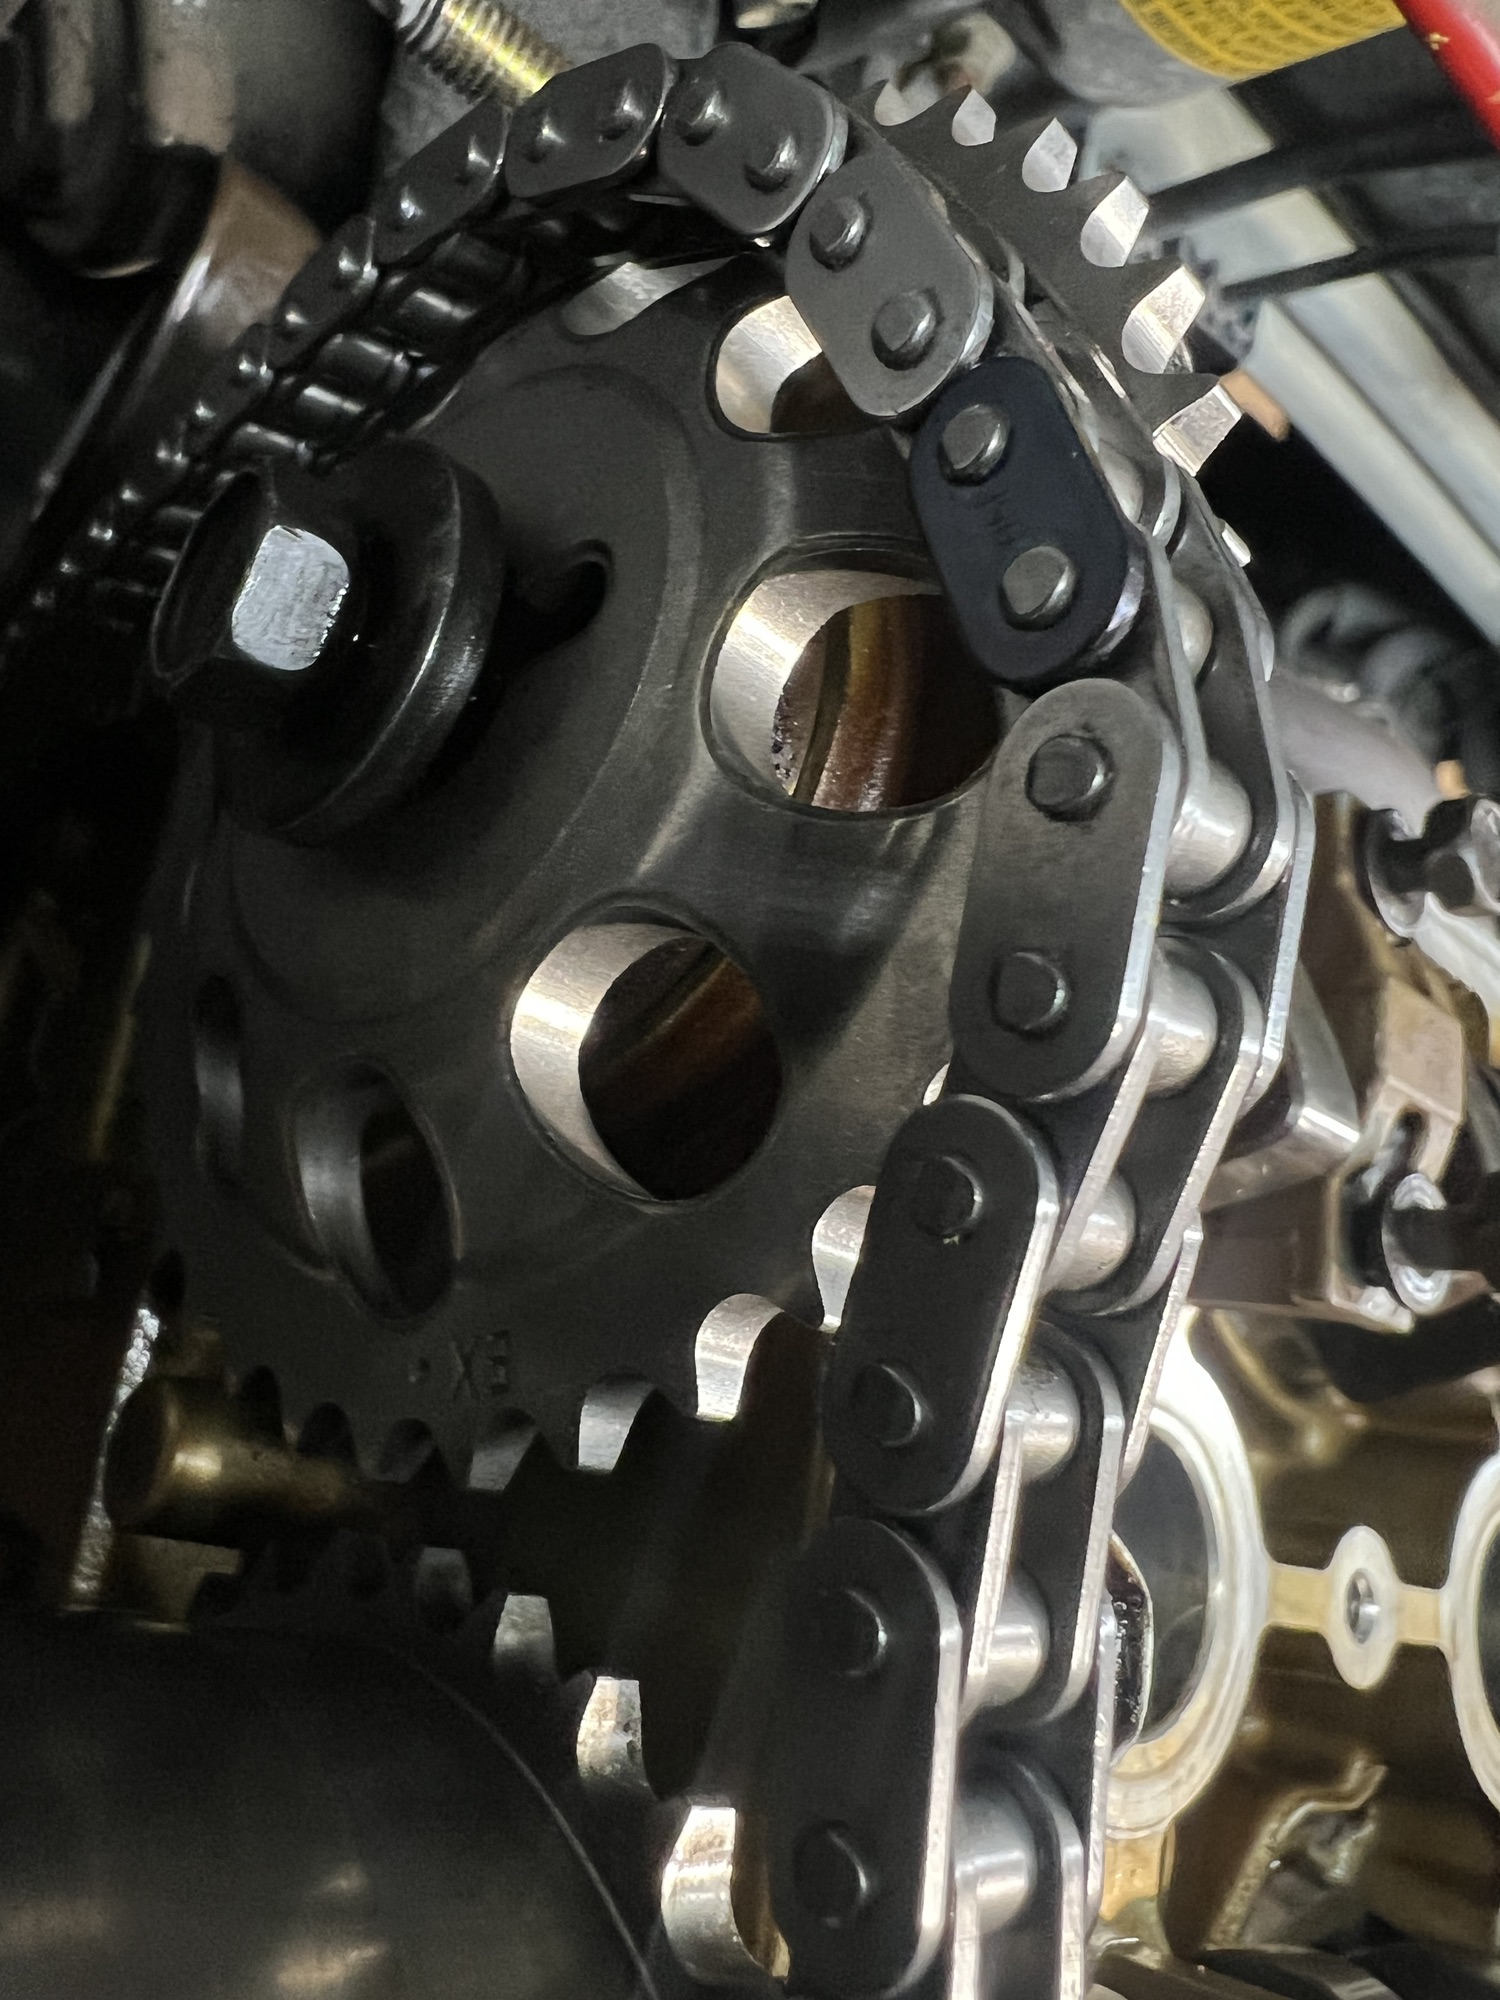
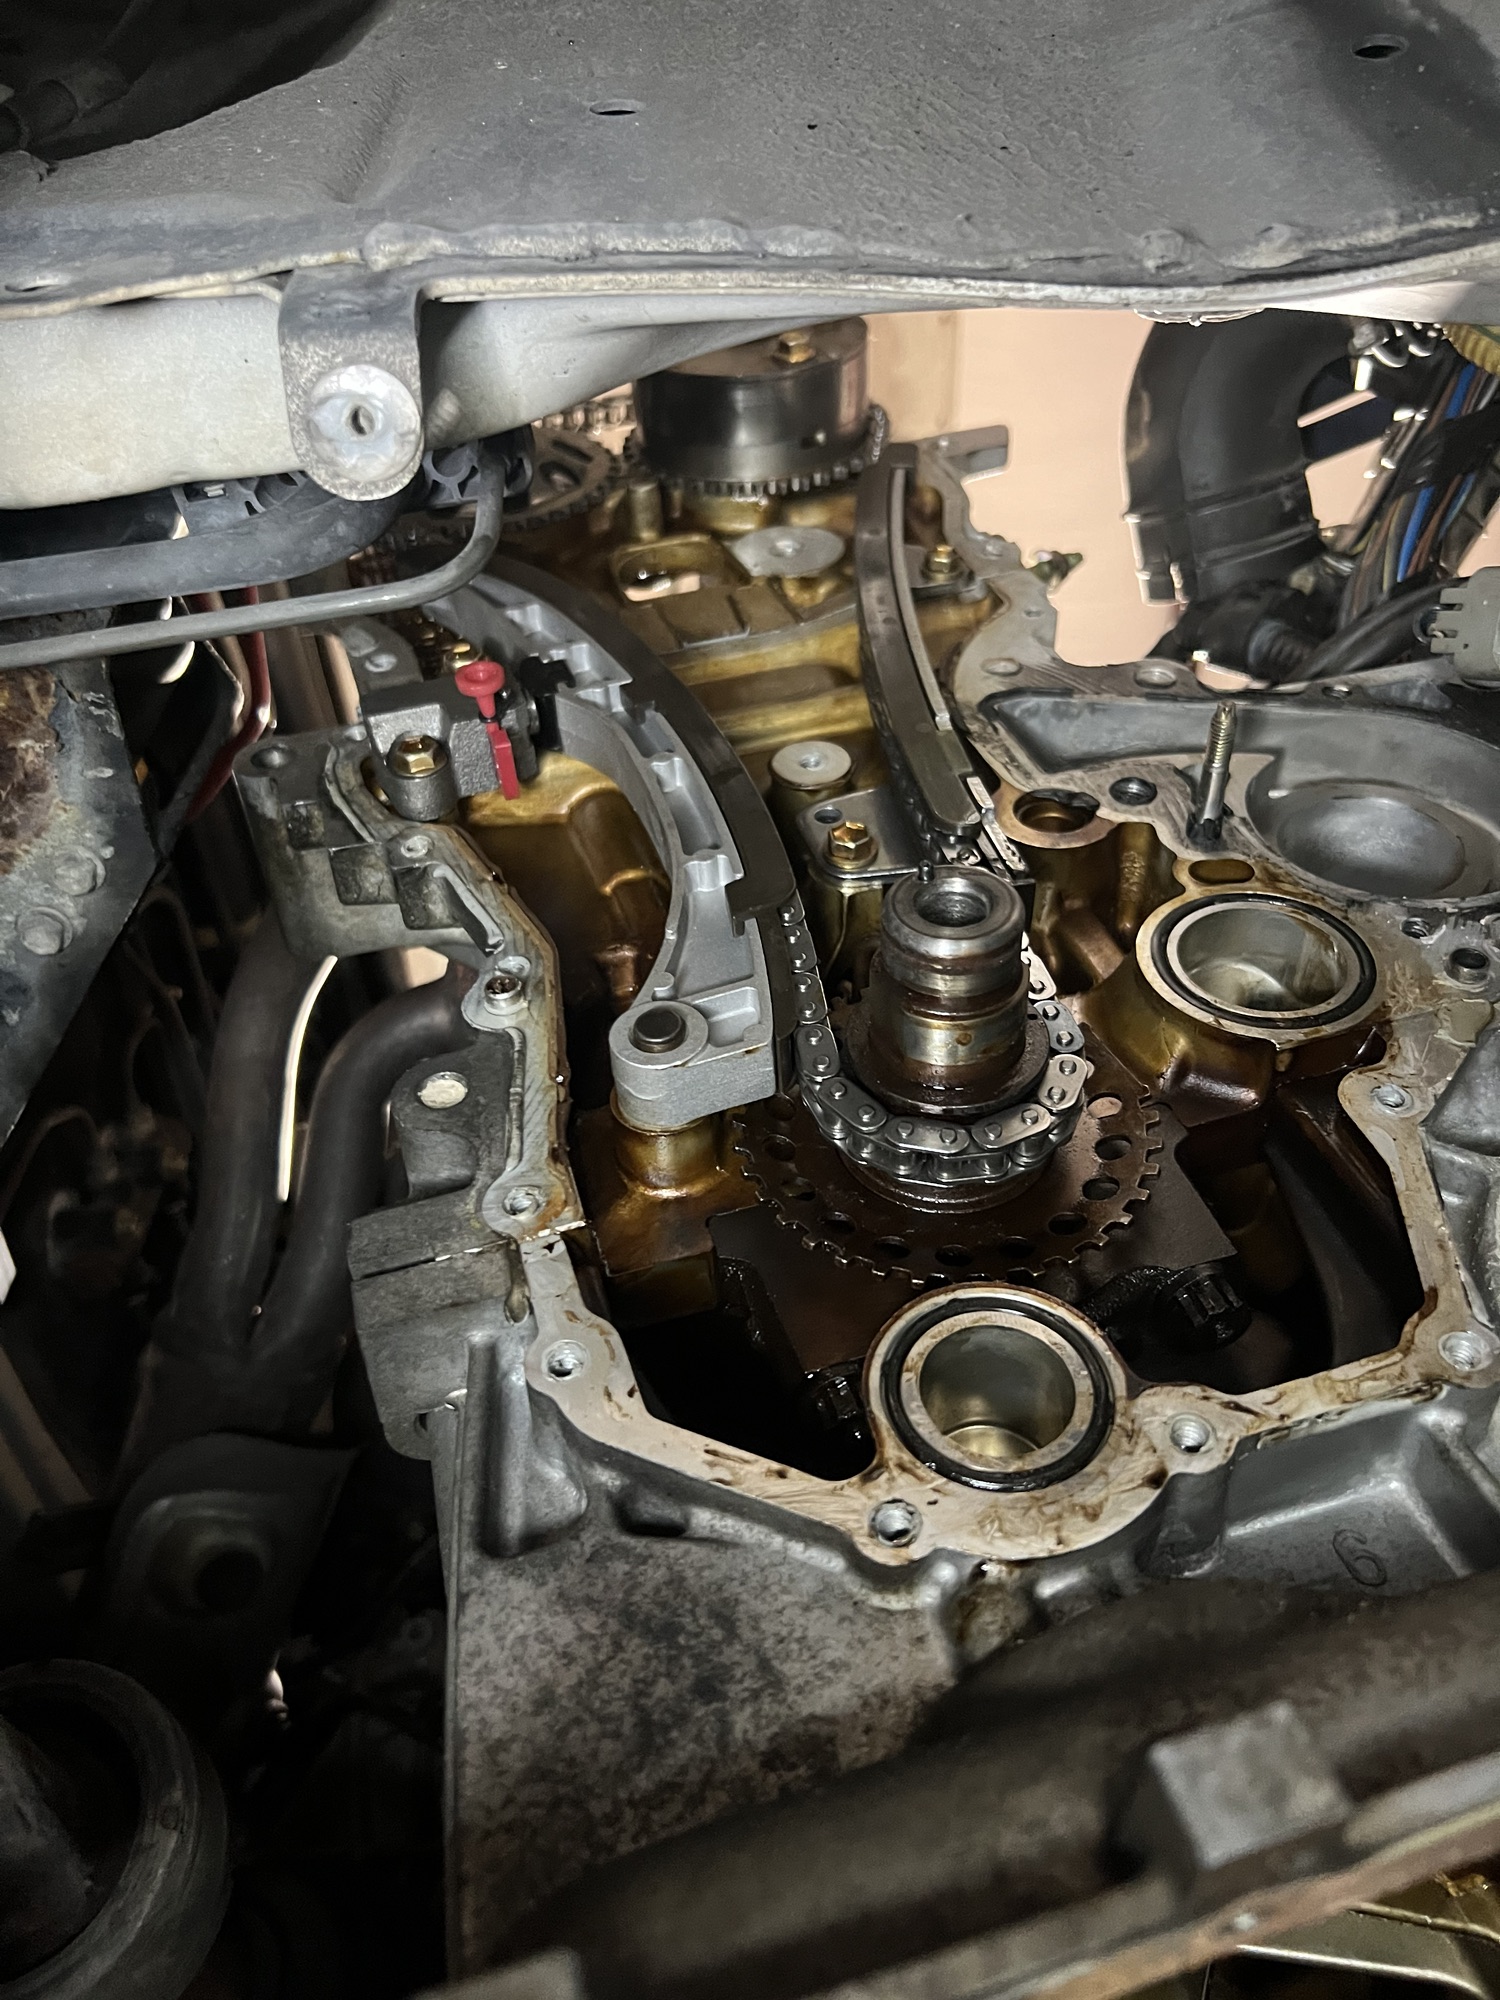
I use my 3/8th torque wrench for this since it starts at 20 ft.lbs I just back it off 3lbs but it really seems like i am going to snap the bolt doing this. I immediately back it off and go check the book again. Glad I did that torque spec is only for the #1 bearing cap that is held down by 3 larger bolts. With that taken care of I start to tighten the intake cam bearings but stop when I realize that the timing chain is not holding the cams in place. I unpack the new timing chain and place the colored links on the timing marks at the top of the cams and crawl under to line up the lower crankshaft sprocket. With this done I realize I need something to hold the chain as I get the tensioning parts. I opt for a piece of copper wire that i wrap around the chain just above the bottom sprocket that keeps it on the right teeth. I get what i need to tighten the tensioner and crawl back under and shove my fat arm up into the small space that I have to install the timing chain tensioner. I torque it to 80 in.lbs. and I’m done! I get to the top and decide to take some pictures.

I see the colored links lined up on the timing marks, but then I see it. The actual timing mark on the left sprocket is actually 90º to the left. How the hell did the cam move that far off??? I end up having to undo all the cam bearing towers and remove the chain tensioner again. Then I decide to remove the exhaust cam sprocket. I grab the new one and mark the correct timing point with a yellow paint marker and rotate the cam without depressing the valves. One in the correct timing, I put the new sprocket on and retorque the cam to the correct settings in the correct order. I fight again with the timing chain to get it all in the correct 3 positions while I hold the guide with one hand and install the tensioner with the other hand.
Although it doesn’t represent a lot of work. It was a lot of work and I am very pleased that I finally feel good about the timing. Lunch over I head back up to the house. I would like to head back down here after work and get the timing cover installed. that would be a great accomplishment. We will have to see.