Friday I bailed from work at around 3 and got to wrenching.
Things that got done from the list left over….
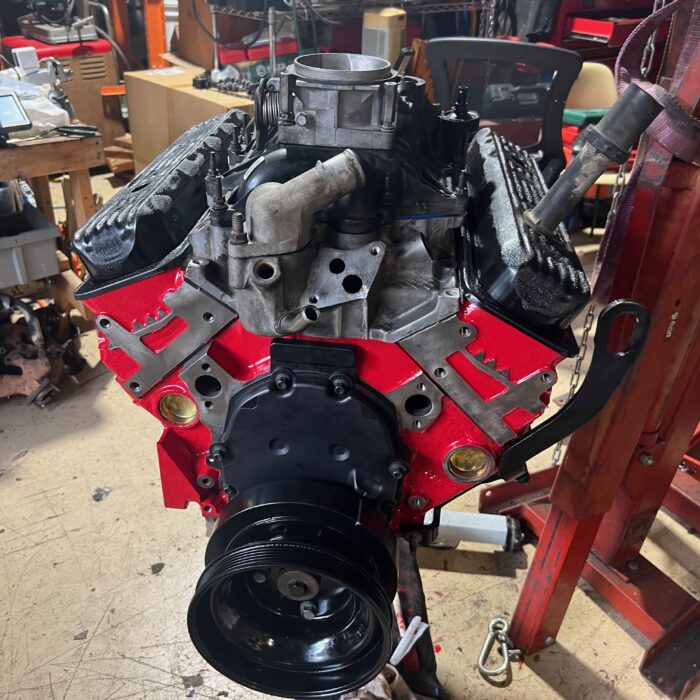
- torque the vibration damper bolt to 70 ft lbs
Attach the wiring harness to the firewall and inside the passenger side- I
nstall spark plug wires Install Spark Plug wire guides on valve cover boltstorque valve coversInstall spark plugsClean and paint radiator top mounts- Paint Power steering pump – This never got done. (not sure why)
Install the serpentine belt( no clue why I didn’t order a new one)Install the fan and fan clutchInstall the fan shroudinstall the top radiator hoseInstall the cold air intakeInstall the throttle cables- Install the new cruise control cable and box – needs rebuilding
Install the BatteryInstall the Positive Battery cable to the AlternatorInstall the Positive Battery cable to the ComputerInstall the Positive Battery cable to the Battery- Install the Negative Battery cable to the battery
I decided to start with the spark plugs. They can be a PITA so getting it over with will get that hard part done. I fiddled with a couple of different socket and extension arrangements and figured out that the plug either when in with no issue or it was not going in at all because the heat shield was in the wrong place and was blocking the socket. So I loosened all the manifold bolts and when all 8 plugs were in place and torqued. I re-torqued the manifold bolts. The plug wired connected quickly after that and the couple on the drivers side that were short made me check the firing order again and resolve the wrong wires plugged into the cap on that side. The passenger side got re-checked and was given the passing grade. The two center valve cover bolts hold the spark plug wire harnesses and all were tightened so it would not leak oil.
Speaking of Oil I decided to add it now. 6L of 5W30 Mobile 1 synthetic. It is expensive but as long as you don’t let it go for > 20K miles on an engine with 250K miles it works beautifully. (Ask me how I know).
Now it was time to finish the front of the engine. I gave the fan clutch a quick clean with the wire brush and got it into place just in time to figure out I needed to put the bottom fan shroud in first. I retrieved the two parts of the shroud from the bed of the truck and gave them a once over with a rag and some degreaser. Then I went back over them with the Maguires plastic restore. It works pretty well and this plastic needs it. The bottom is a PITA to get into place due to where the screws that go into the radiator surround are located. With those in place I put the two large body bolts back in the lower splash guard and that is it for the under side of the truck. I re-installed the fan and decided to hold off on the belt to the hoses were installed and there was less chance of getting antifreeze all over it. I move on to the upper fan shroud. This connects to the radiator hold down clamps that I had already cleaned and re-painted. So I installed them at this point and then put the shroud on top of them. There is a channel on top of the shroud for a battery cable that goes from the positive battery terminal on the passengers side to the computer on the drivers side of the truck. It fit somewhat but not quite right. I reconfigured it to go under the hose and then over the shroud and it fit perfectly. After coating the upper hose with some tire shine, I attached it to the top of the radiator and to the water neck on the engine. At this point I decided to add the antifreeze. Since I have made so many mistakes in my life I have a plethora of lessons to learn from. Adding only a small amount of fluid when filling something and stopping to check for leaks is one of those lessons, and today it paid off. I grabbed the antifreeze catch pan and chucked it under the stream of fluid pouring out the bottom of the radiator. This is deflating. I can’t quite see where it is leaking from. I have to remove the body bolts from the splash guard and stick my head up towards the leak hoping the lower shroud is not in the way. I am able to tell it is coming from the drivers side radiator side tank and not from the core. Looking from the top I can see a plastic petcock to drain the radiator. I should have closed it before I put the lower shroud on. SUCK! Leaving the upper hose in place I remove the top shroud and hope the extra room will allow me to reach the valve. I was in luck and was able to give it a couple of turns. I poured in a little more and waited. Sitting in front of the fan drinking water I watched the trickle of water get smaller but it did not stop. With a couple of minutes rest I feel a little better and give the valve another turn. This time I can feel a positive stop and the trickle goes to a drip and finally stops. The leaking catastrophe is over. (for now). I remember banging the crank pulley into the radiator when I removed the engine. I fully expect it to start leaking at some very in-opportune time.
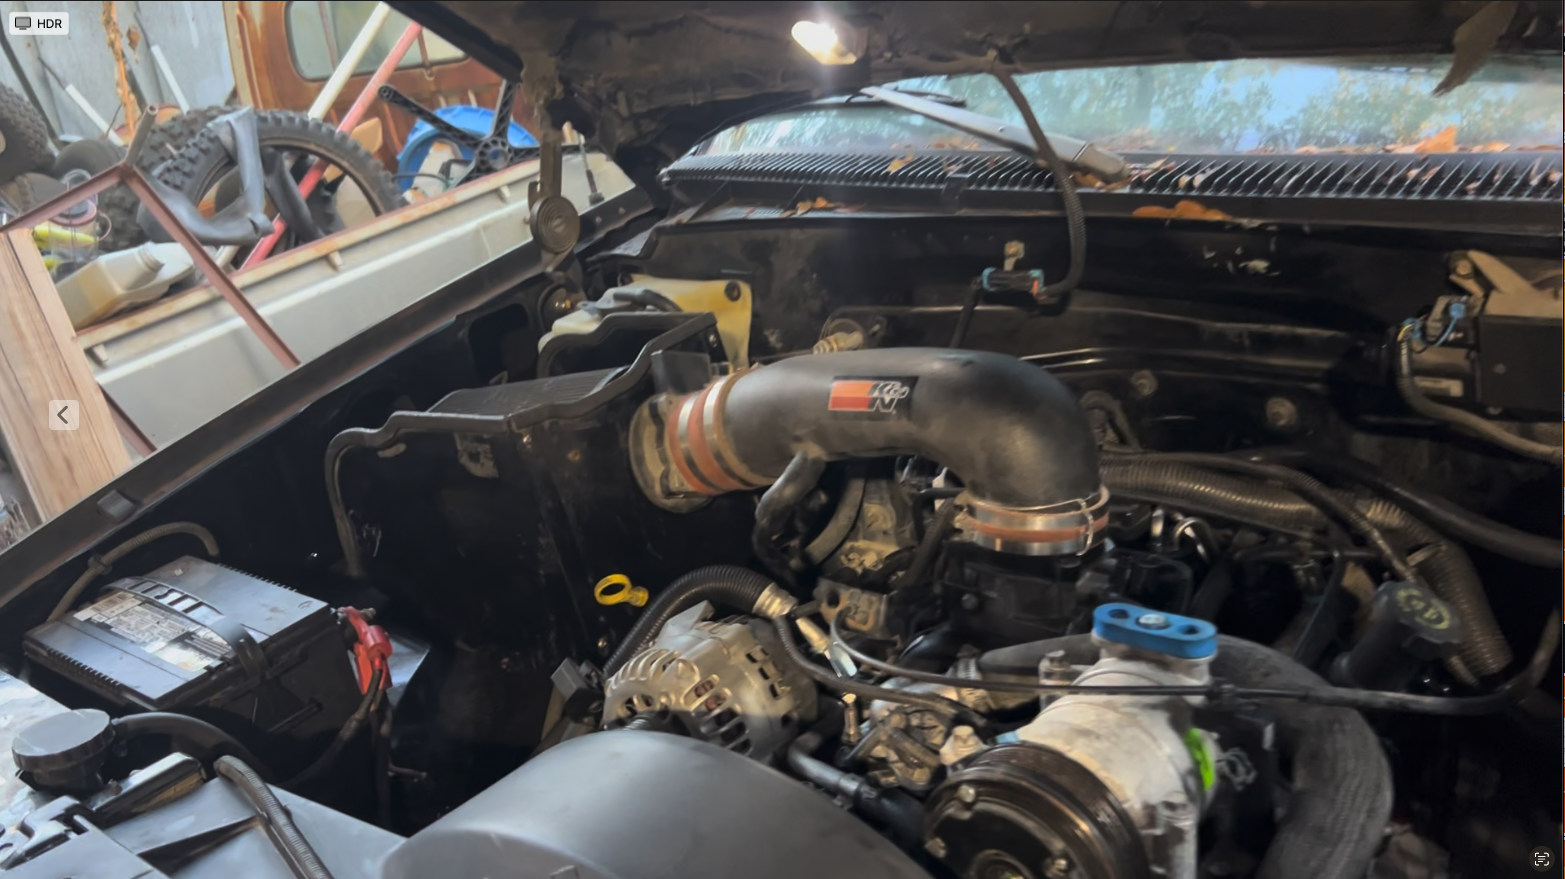
After getting 3 gallons of antifreeze into the system I topped up the overfill and felt satisfied that I could check off that system. Next up the cold air intake system. This one came with the truck when I got it, but to me they all seem like snake oil. and this plastic and metal monstrosity is no different. The rubber hose that connect to the air horn is not a great mechanical bond and it is dependent on the angle of the pipe not changing where it attaches to the flimsily mounted air box on the fender. I got it all in place and tightened all the clamps as much as possible without breaking anything and I attached the wiring harness to the air filter and the MAP sensor. I looked back at the parts box and much to my surprise it was empty. I am officially out of parts to put back on the truck. This is a momentous occasion. Now what? Well that was answered with a text from my Bride. They are ready to eat and would like my presence at the dinner table.
Rather than complain or fight it, I took the opportunity to use it as an excuse to take a step back before seeing if all this hard work as been for nothing. That will have to wait till tomorrow.