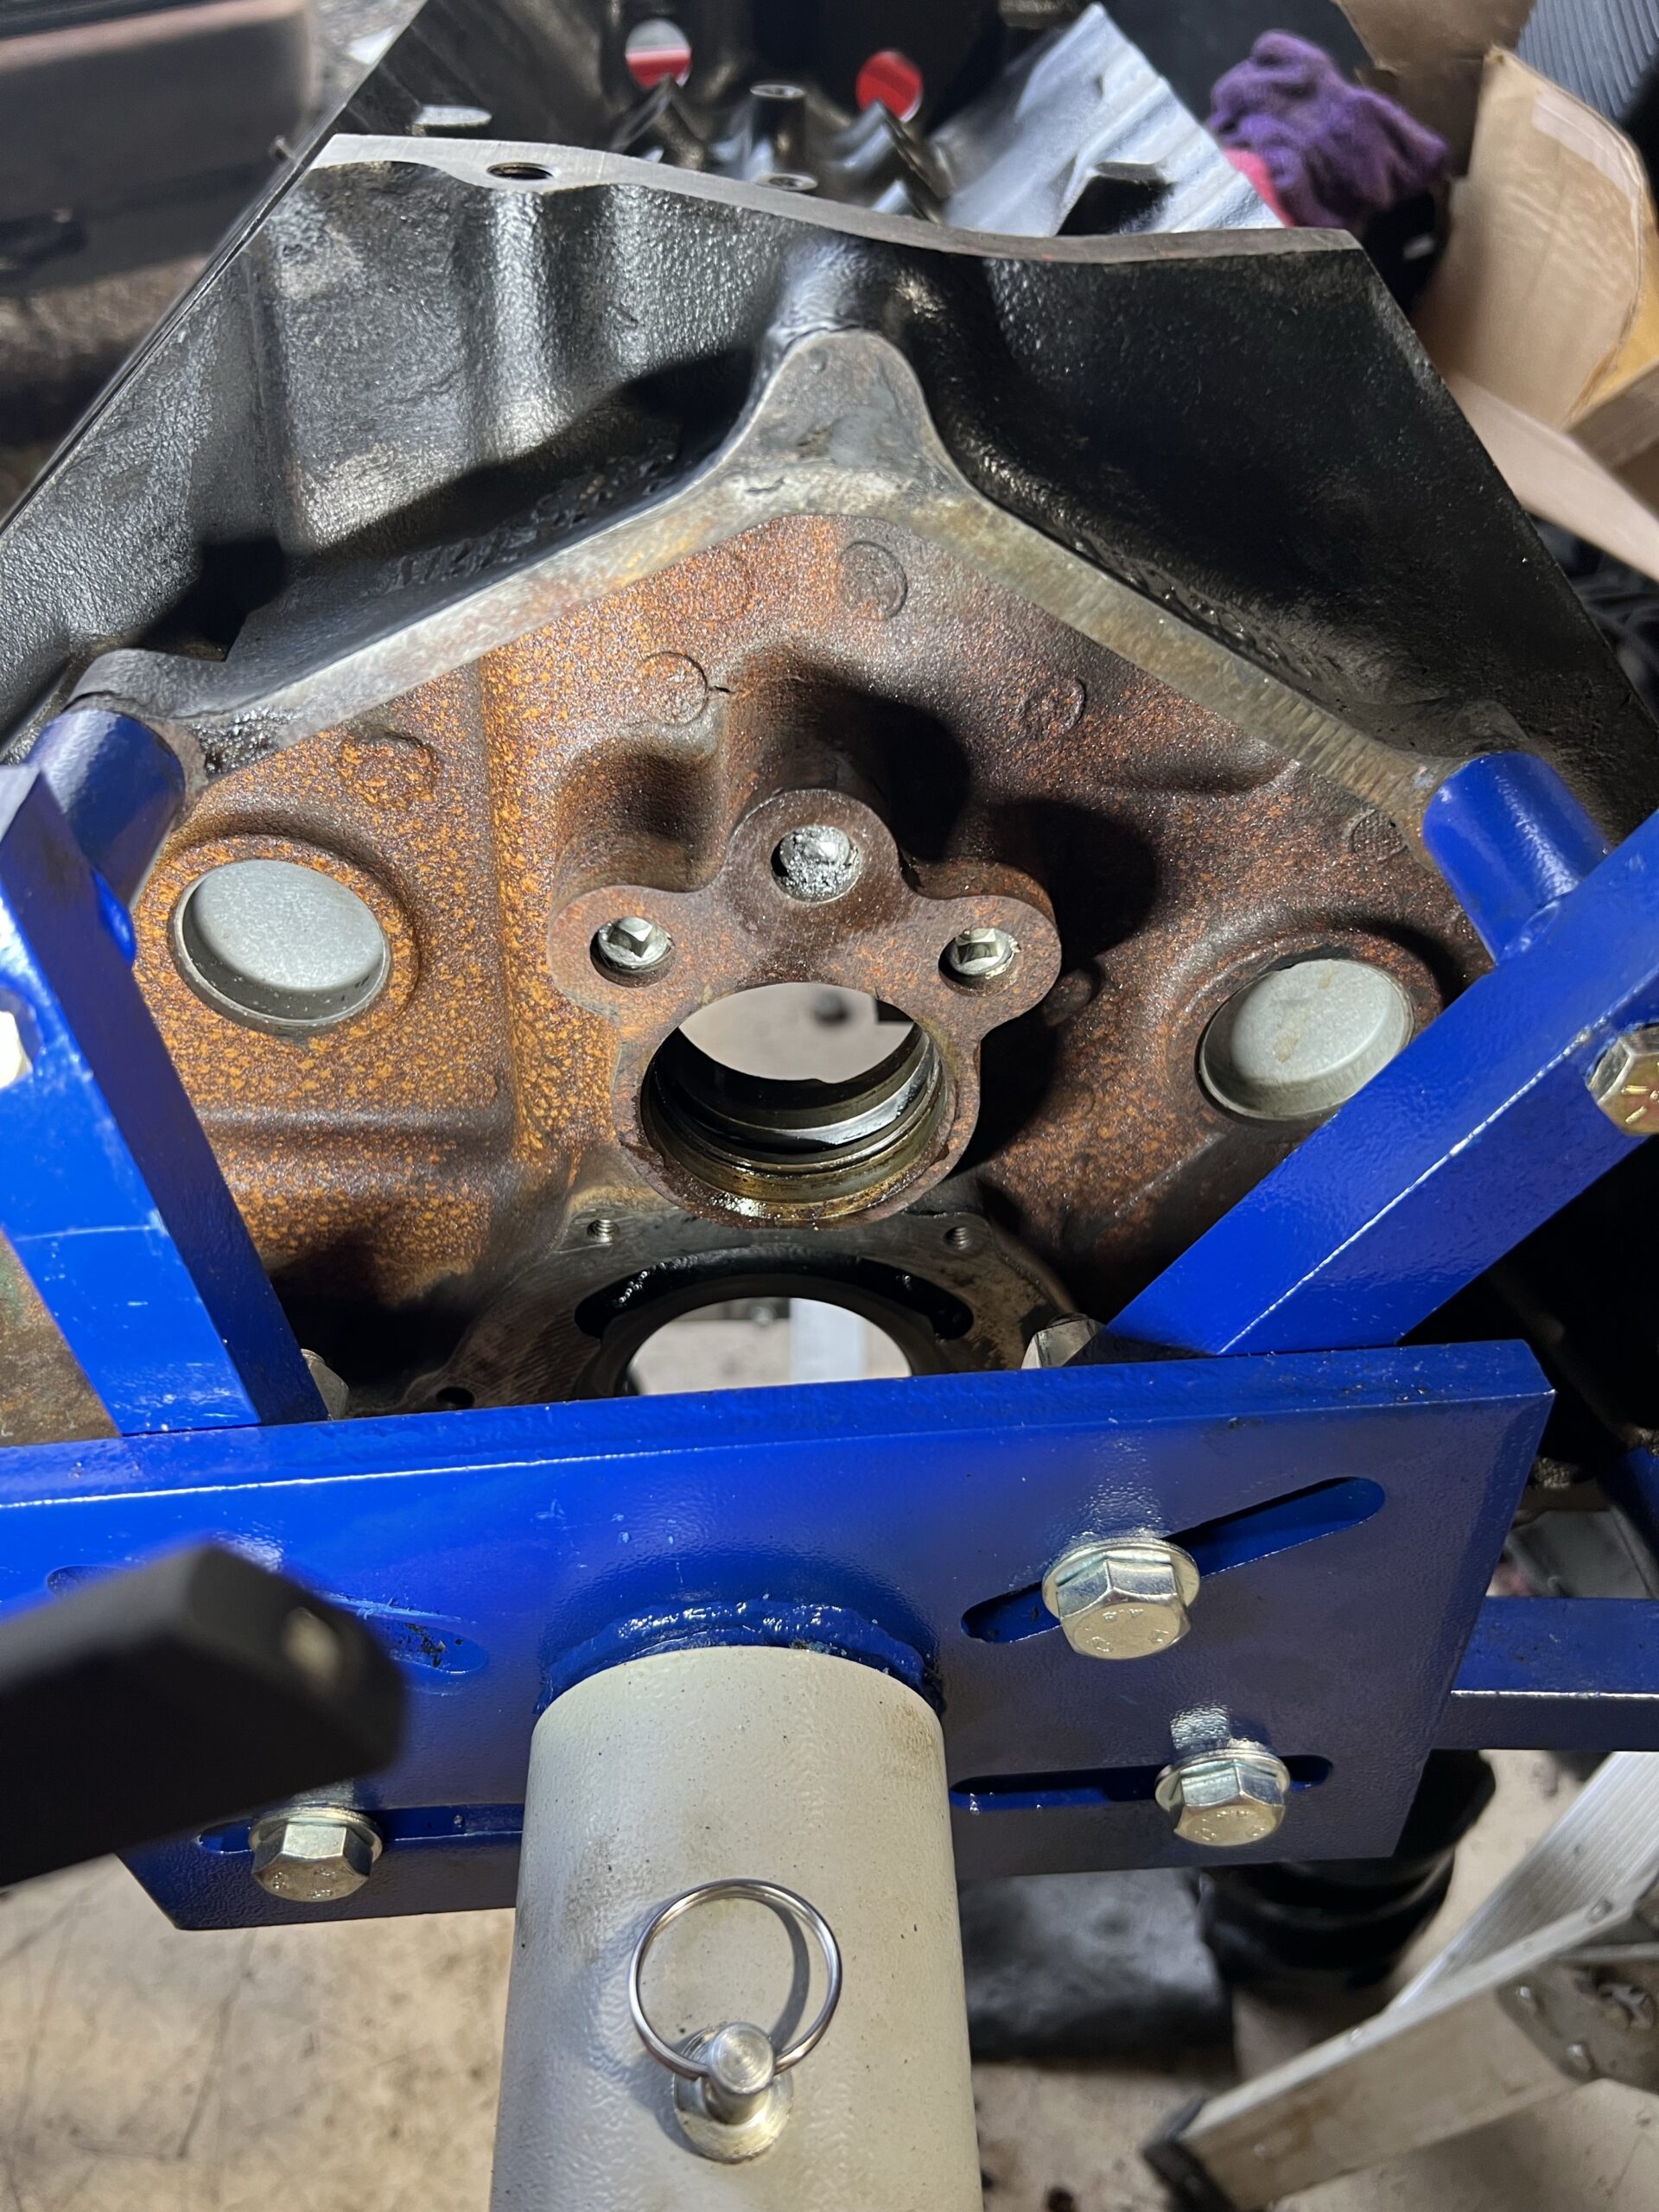
So after waiting for the correct valve seals to arrive, I headed down to the shop for some time with the metal and sludge. The first job I took on was to remove the broken tool out of the freeze plug in the back of the engine. It is the remnants of a 3/8″ to 1/4″ adapter snapped off inside the middle plug, nice and flush so you can’t get any tool on it. I decided to whip out the drill I guess broken tools always make me think of drills. I have destroyed enough drill bits in my time. I tried drilling into it for about 5 minutes promising myself I would take a break each time any smoke would start. The bit never seemed to be able to get any bite on it and kept bouncing off some harder surface. I decided maybe I could just remove the other two for now using my newly purchased tools.

The set on the green rack are “specialty” shapes on 3/8″ drive sockets. To my absolute horror, NONE of them fit. All of them are too big. Not cool. That was about $30 of tools, I will not be sending these back, because I know there are a ton of other things they will come in very hand for, but I really thought this was a more normal size. So after double failing on the freeze plugs, I moved on to the heads.
I am pretty disgusted in what is going on with this rebuild. Things that should be simple are not, tools purchased for specific purposes fail and everything is taking double the time it should. Oh yea, and there is no room in the shop to work. I am also making stupid mistakes. One of the rules for working on your engine that you should follow is. If you are going to re-use the heads and cam etc. You must keep them in order so they go back in the same way they came out. With most of the parts, it is just a matter of lining them up in the order they came out. I even got a tray with special compartments to keep everything in order. Sadly that tray is still full of the other engine I haven’t put back together yet. But with this nice stainless steel surface I was able to lay everything out. Even with things lined up it still gets confusing. I had the left head on the bench first with the exhaust ports up and the springs towards me. This way I could use the spring compressor tool with the easiest access. Once I had done both heads they sat on the floor with only the parts on the table. Luckily the drivers side has the threaded hole where I removed the water temperature sensor. Unluckily I didn’t realize it until I had already lapped the exaust valves in the wrong head!! Son of a B!tch. Just stupid. I almost put the valves back in backwards order. I managed to remember the head was now exhaust port toward me so I needed to pick the valves starting at the other end.
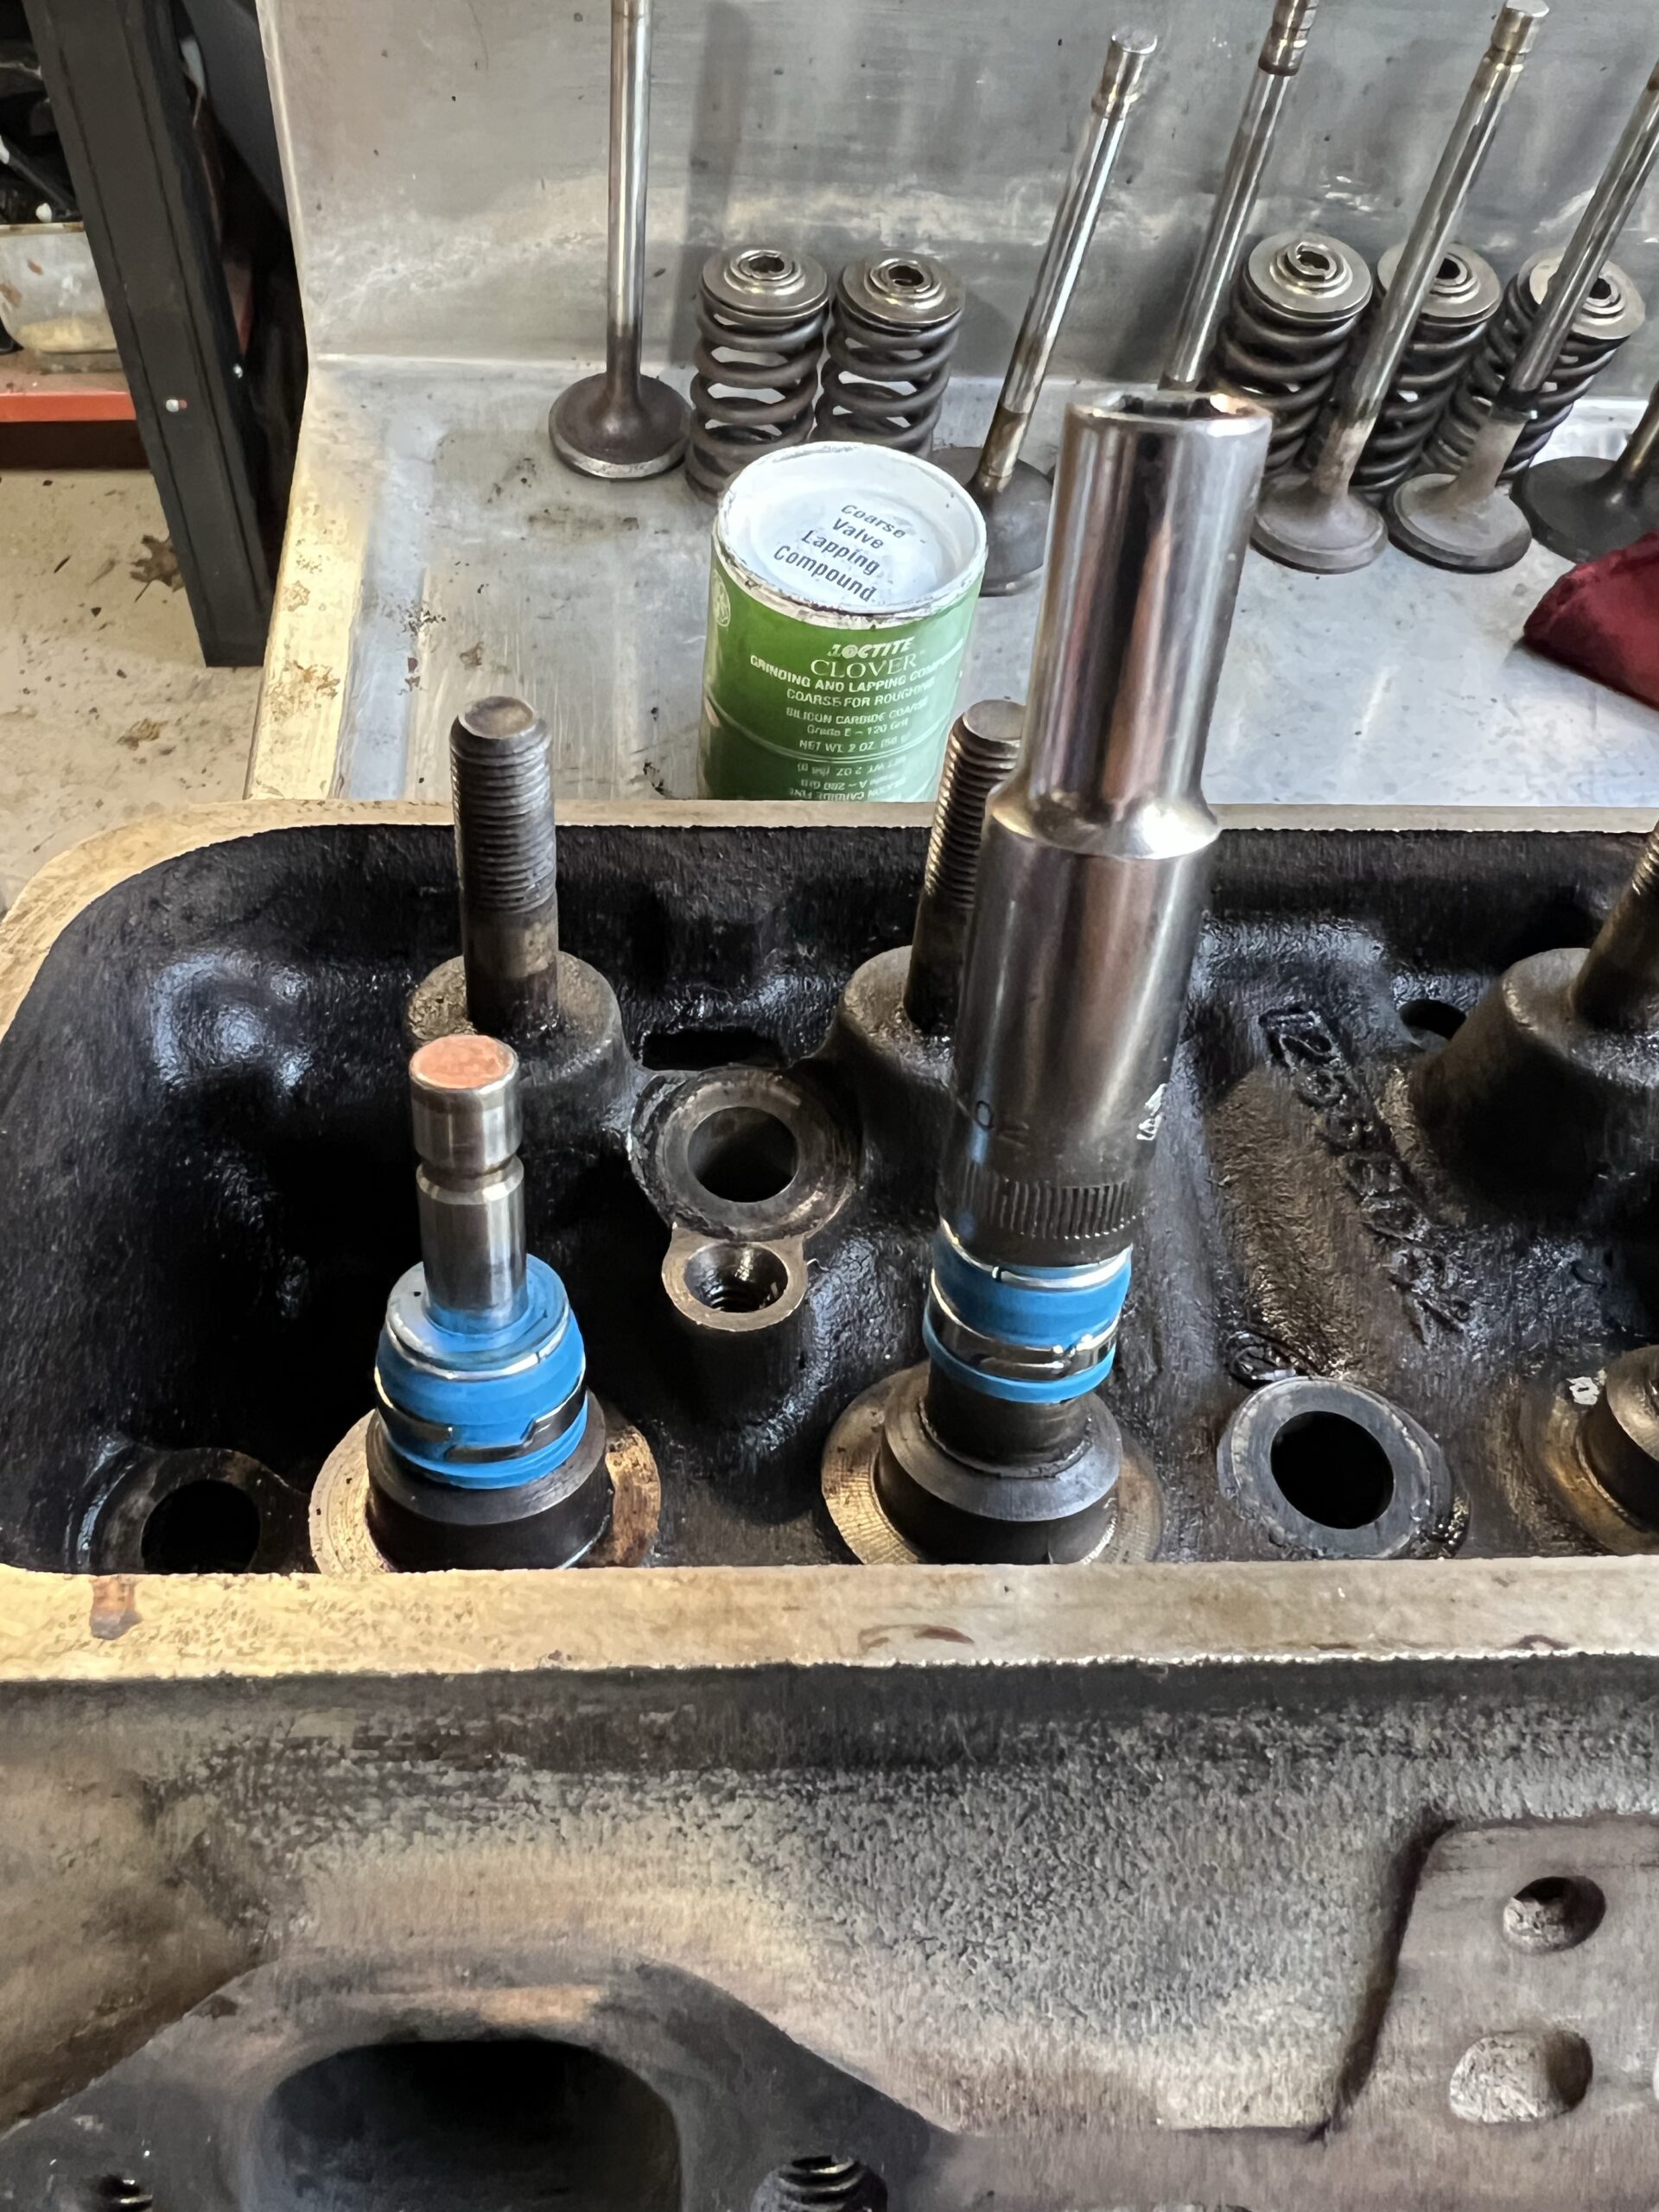
With the correct valves in the correct position on the correct head, I installed the seals using the back end of a 3/8″ drive deep socket. I tapped them down with a deadblow hammer and light taps. I faced all the spring openings on the seals towards me so I could tell wha they were doing. They all look good. I also oiled the end of the valve before dragging the seal over them.

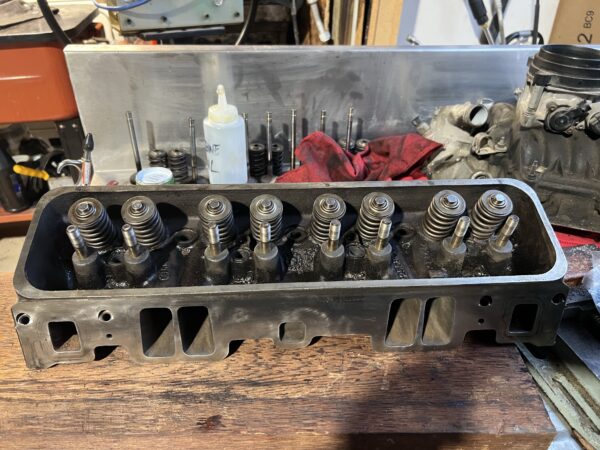

After getting all 8 of the valves installed in this head, my hands were aching and my back was killing me. So I called it a day. This head still needs some more degreasing, and a lick of paint added, it will then have to wait to be installed before adding anything else. So far the pushrods are still in order and even the correct way up, which is difficult to keep correct. I only managed to clean a single roller lifter and it took 20 minutes. Only 15 more to go. I pulled the oil pump out of the parts cleaner after sitting for 2 days it was aggravating still covered in slimy gunk. I would have liked to have got more done but really I’m still annoyed with everything.